Create your own interactive guide with Guideflow
How it works
Here is a step-by-step guide on how to create a drop down menu in WordPress:
1. First click on "Appearance" option in the left sidebar
2. Next click on "Editor" link in the Appearance submenu
3. Then select the "Templates" option from the left sidebar
4. Click on the template you want to edit in the templates list
5. Select "Navigation" item from the left editor panel
6. Click the "Options" button (three dots icon) next to the "Menu" item
7. Select "Add submenu link" from the dropdown options
8. Select the submenu you want to insert from the dropdown options
9. Finally click the "Save" button to apply your changes.
Why should you use this feature?
WordPress is a powerful platform designed to create stunning websites with ease.
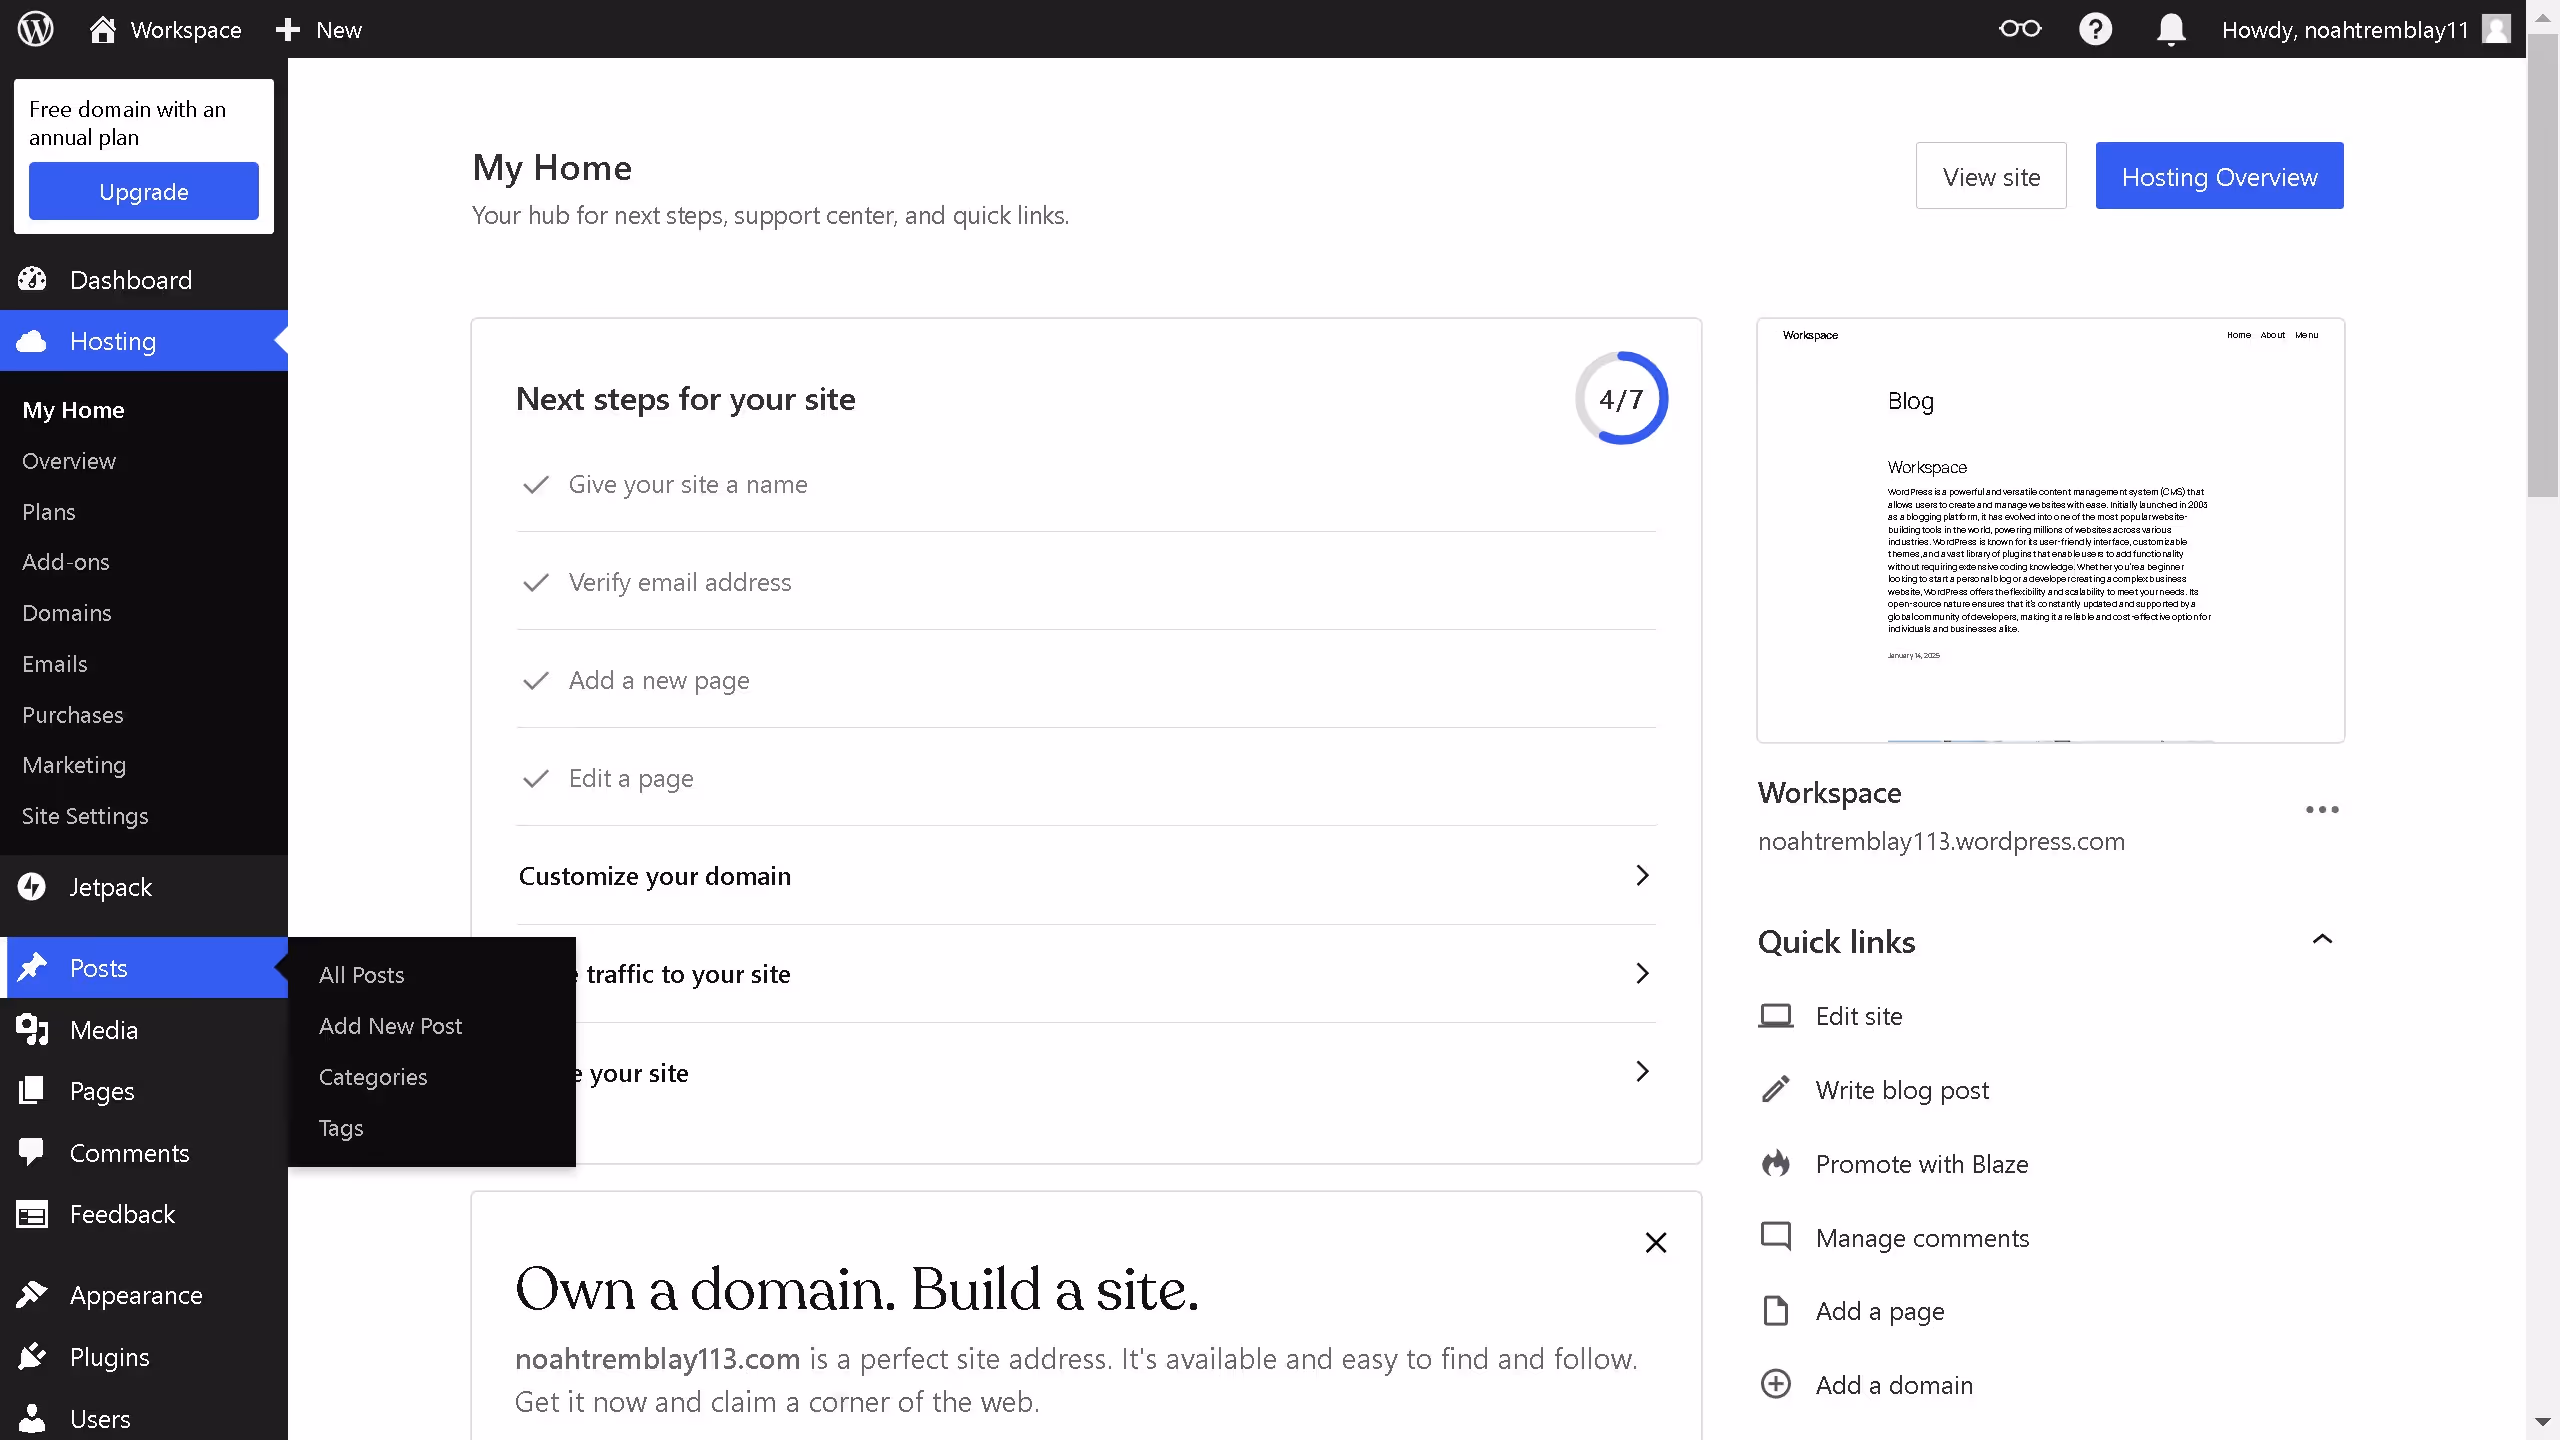
One of its standout features is the ability to craft intuitive drop-down menus. These menus enhance user experience by organizing content neatly, making navigation effortless.
Using drop-down menus in WordPress streamlines the browsing process, keeping visitors engaged by minimizing clutter and emphasizing essential content. This feature is perfect for sites of all sizes, helping to present a professional, clean appearance.
Ultimately, drop-down menus in WordPress contribute to efficient and user-friendly site navigation.
Built to impress
Why leading companies build with Guideflow


