How to activate the Custom Task IDs in ClickUp
Here is how to activate the custom task ids in clickup
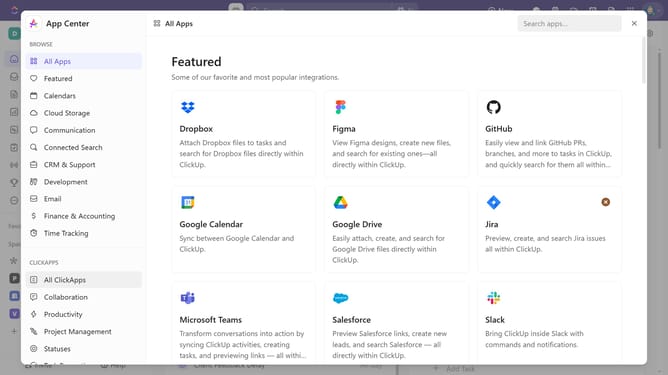
- First open the App Center and click on the "All ClickApps" option under the CLICKAPPS section
- Next find the "Custom Task IDs" in the ClickApps list and toggle the ClickApp on to activate it
- Then click on the "Select Spaces" dropdown menu and select the Spaces where you want to use Custom Task IDs
- Once enabled, set a task ID prefix and starting index for better task organization
- Finally, once done, click the "Create" button to confirm the Task ID customization
Why should you activate the Custom Task IDs in ClickUp
ClickUp is a versatile productivity platform designed to streamline task management and team collaboration.
Activating Custom Task IDs in ClickUp elevates your task management experience by offering a personalized approach to tracking and sorting tasks.
By using Custom Task IDs, you can create a unique identification system that enhances project organization, fosters better communication, and simplifies task referencing across your team.
This feature ultimately leads to improved workflow efficiency and a seamless project management experience.
Last update