How it works
1. First click on the "Dashboard" icon in the left sidebar menu
2. Next in the Dashboards Hub, click on "New Dashboard" button in the top-right corner
3. Click on the "Start from scratch" option in the dashboard templates view
4. Click on a category from the left sidebar menu
5. Then find and select your desired card from the available options
6. In the card setting, click on the data source dropdown to select locations
7. Then select the relevant Space, Folder, or List to pull data from
8. Click "Add card" button to add the widget to your dashboard
9. Your dashboard is now ready to use, customize, and add more cards to it as needed
10. Next click in the dashboard name field
11. Finally, enter a name for your dashboard
Create your own interactive guide with Guideflow
Why should you use this feature?
ClickUp is a comprehensive platform designed to unify all your work in one place.
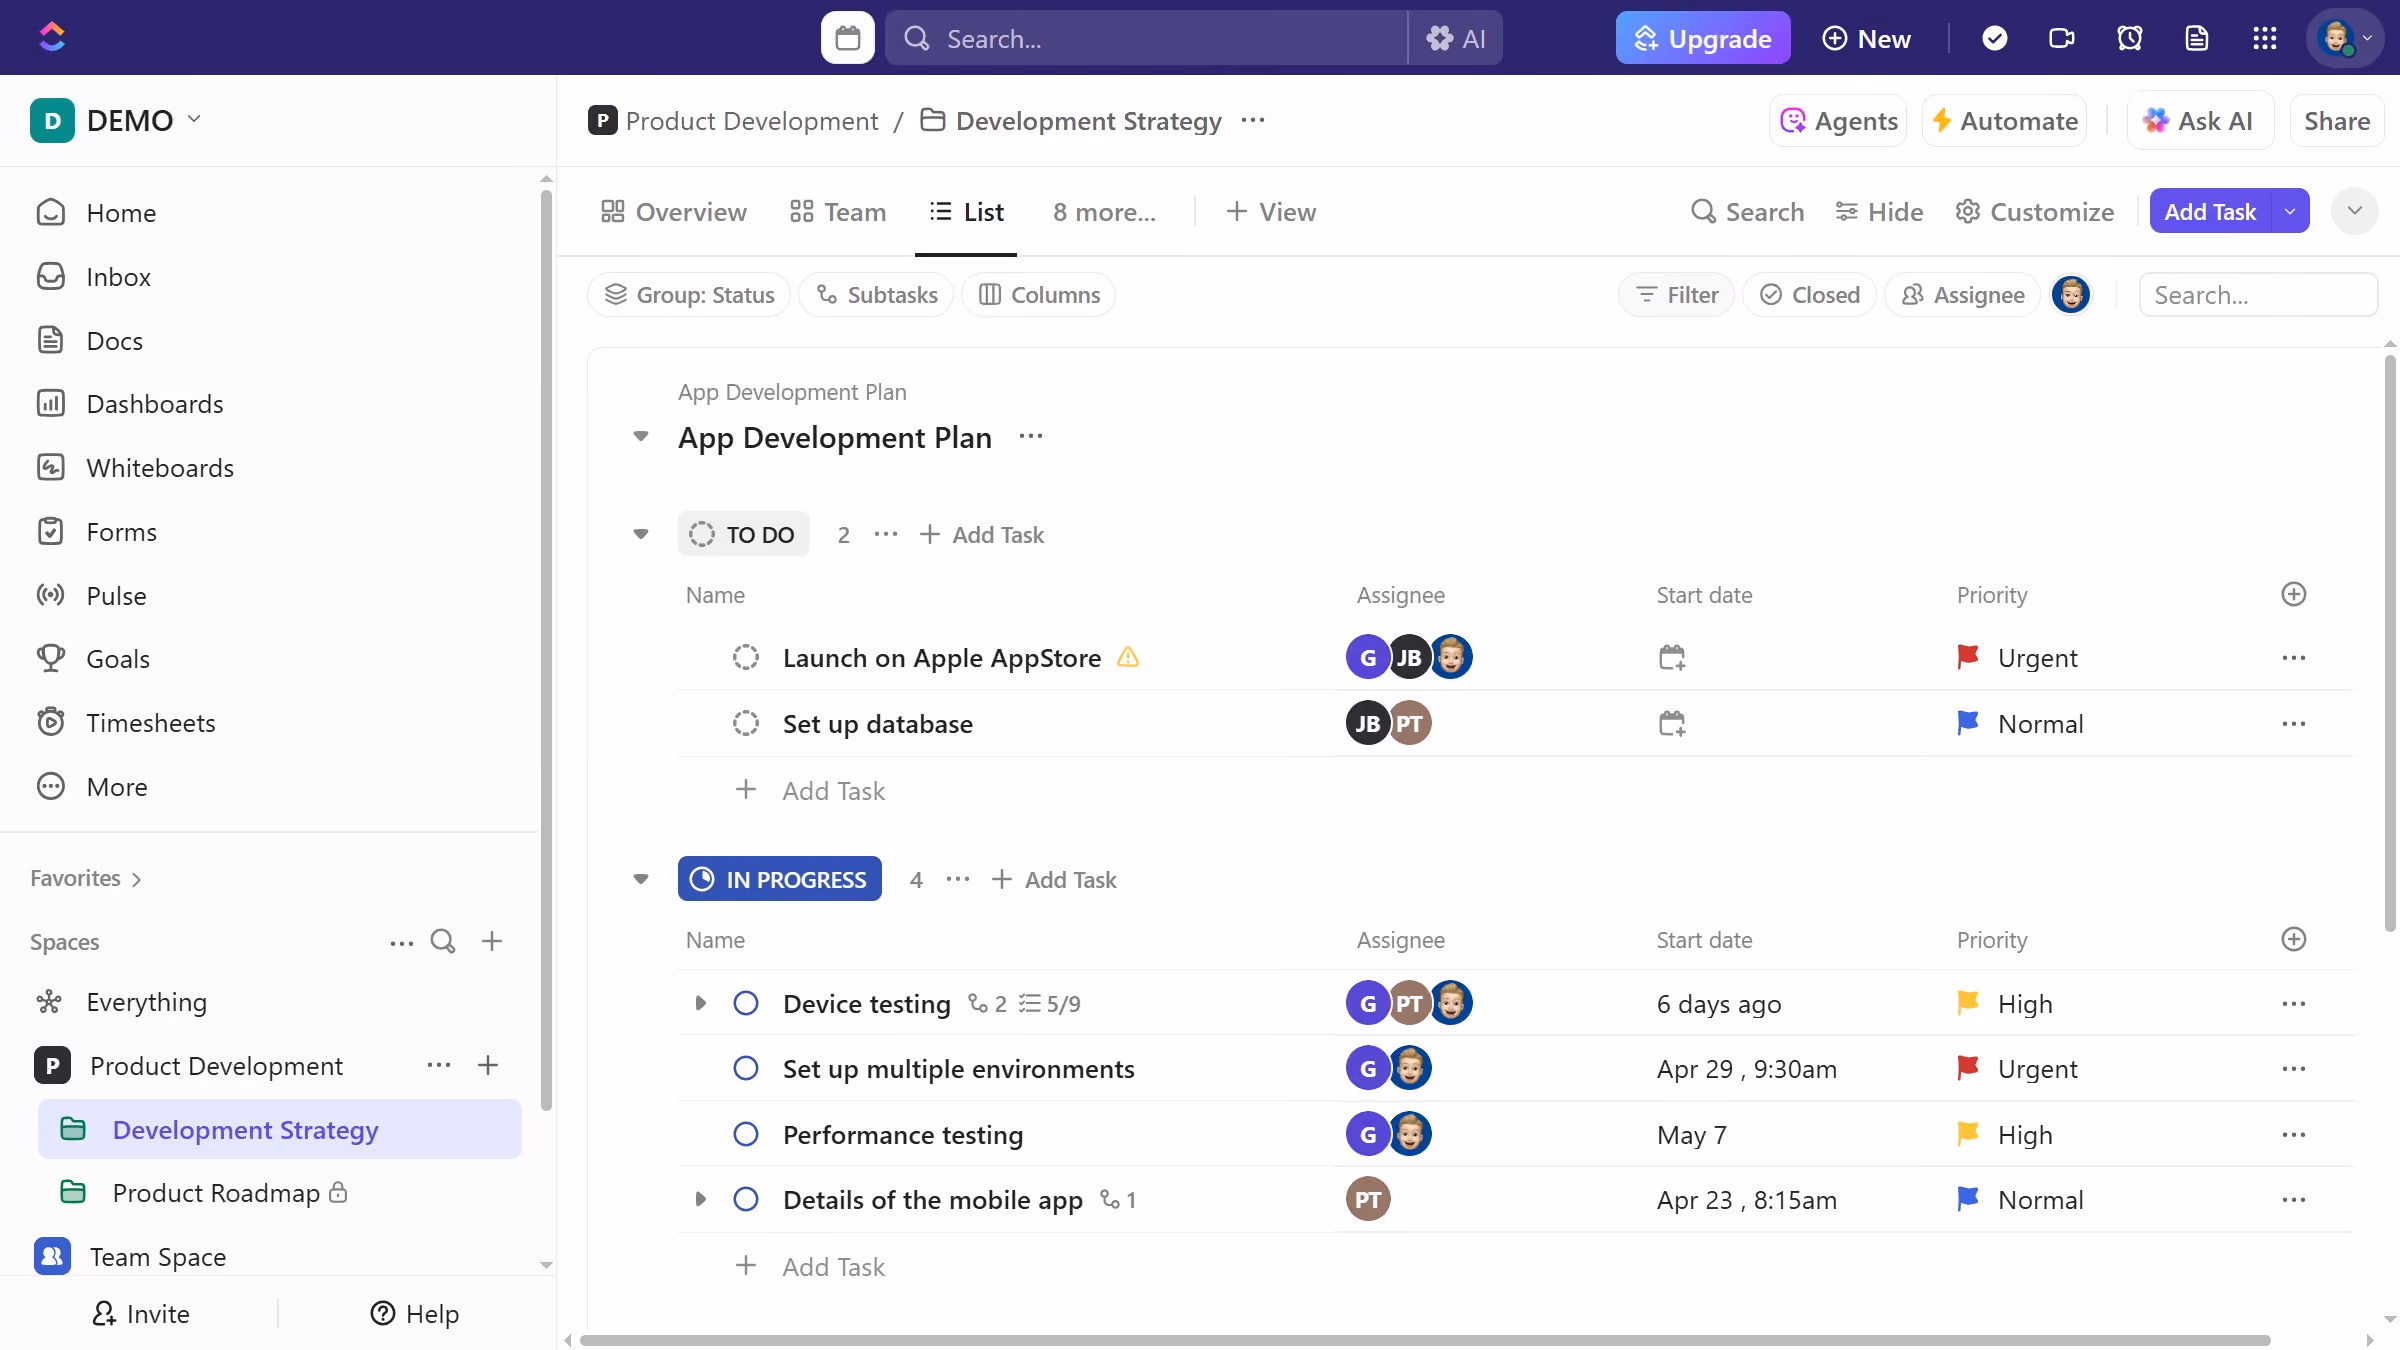
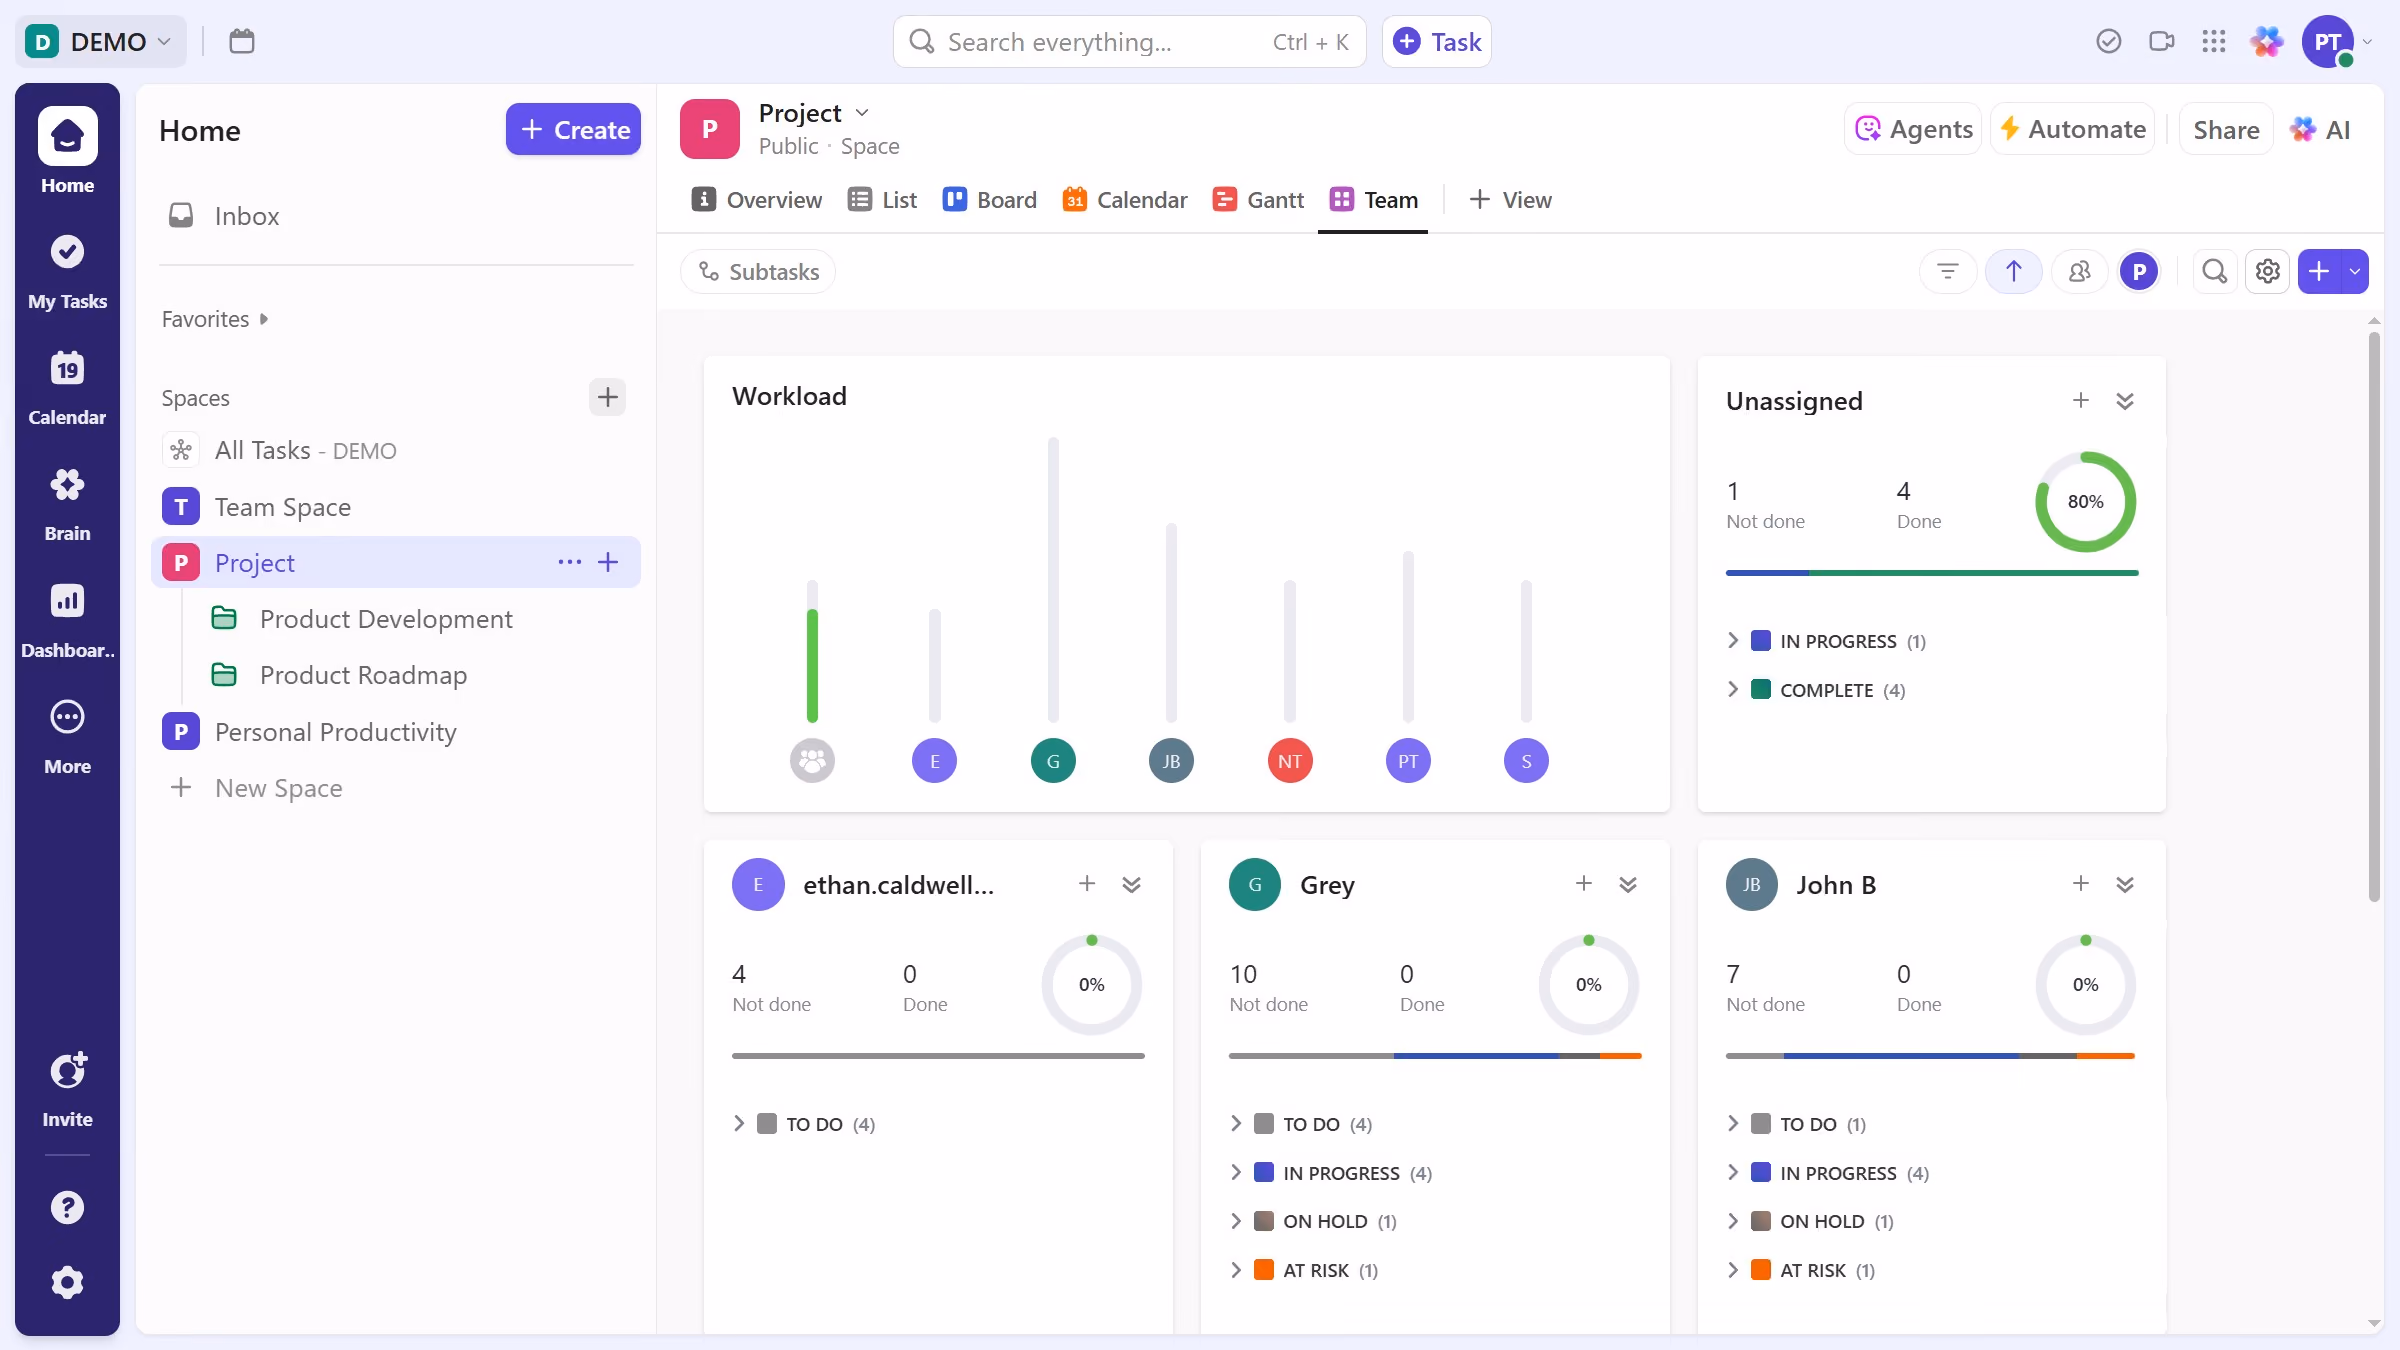
Creating a custom dashboard in ClickUp helps streamline task management by offering a tailored view of your projects and priorities. This feature allows users to display specific data points, widgets, or workflows, enhancing efficiency and focus.
The personalized view facilitates better decision-making and productivity by letting you track essential metrics and visualize project progress at a glance.
Ultimately, a custom dashboard empowers teams to stay aligned and agile, adapting quickly to changing needs.
Built to impress
Why leading companies build with Guideflow


